
How to Cook the Perfect Steak Every Time
There’s nothing we love more than a perfectly cooked steak. However, cooking a steak can be a daunting task for most people because it’s just hard to know when the steak is cooked to the right doneness! In today’s post, we will share with you our fail-proof way on how to cook the perfect steak every time. We will also share with you some of the essential kitchen tools that you’ll need to get consistent results, along with our tips & tricks on how to cook the perfect steak every time.

What are the different ways to cook a steak?
There are many ways you can cook a steak. Here are 4 of the most popular methods to cook a steak, including pros & cons of each:
Grilling
Grilling is probably the most popular method to cook a steak. Not only does it leave nice grill marks on your steak, it also produces a nice smokey flavour that you only get from cooking a steak on the grill.
However, unless you are very familiar with the temperature of your grill or you are very experienced at cooking steaks, there is a higher margin of error here. In other words, there is a higher chance you may overcook your steak as it is more difficult to control the heat of the grill. This method also requires you to own a BBQ which may not be a feasible option for individuals living in apartments or condos.
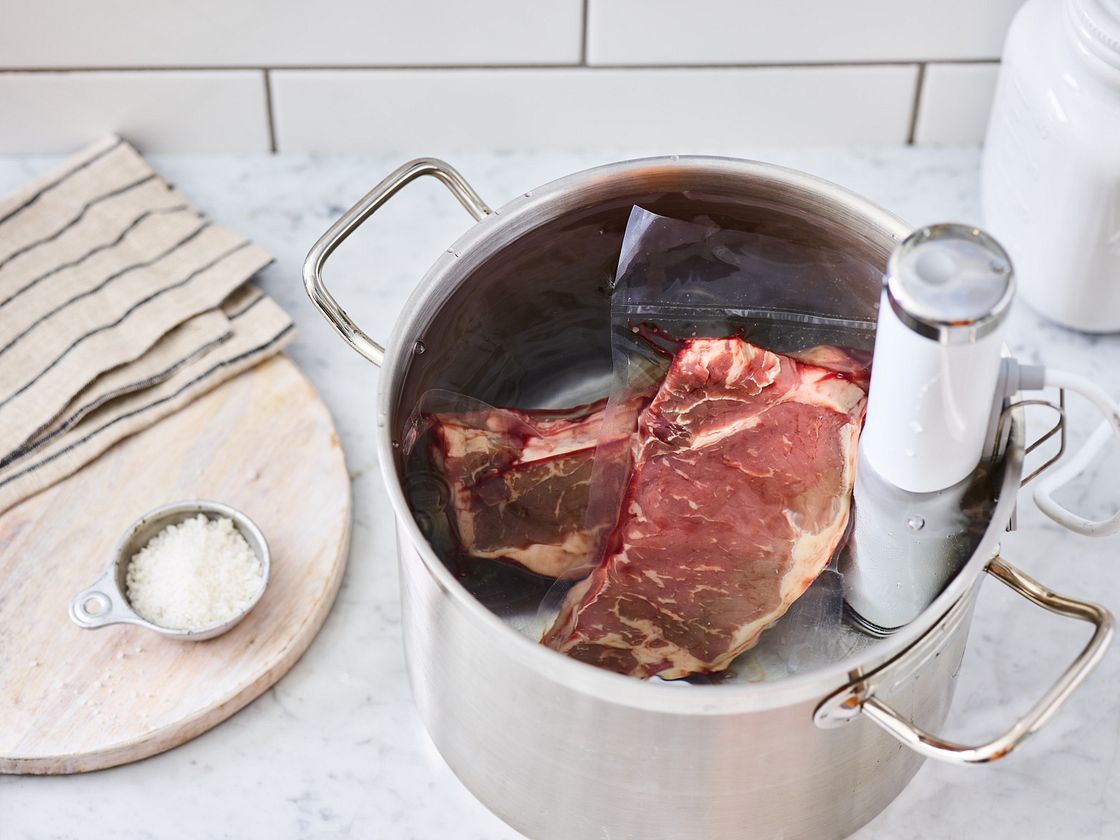
Sous Vide
If you happen to own a sous vide, this is probably the best way to cook your steak as it allows you to cook your steak at a very controlled temperature. Sous vide cooking involves putting your food in a vacuum sealed bag and cooking it in a temperature controlled water bath. Once you finish cooking your steak in the sous vide, most people will just finish the steak off on cast iron pan over high heat to get a nice sear and lock in all the juices. This method almost always guarantees that your steak is cooked to your desired doneness.
However, sous vide machines can be quite expensive. They also require a considerable amount of water for the machine to sit in and it requires quite a bit of time for the machine to ‘warm up’ to the desired cooking temperature. We have a sous-vide by Anova and really enjoy it but for the reasons mentioned above, we don’t use it often to cook steak.
Pan frying
Pan frying is probably the most common way home cooks choose to cook their steak. It involves cooking your steak in a pan over high heat to develop a nice crust around the steak which will seal in the juices.
However, similar to the grilling method mentioned above, unless you’re experienced in cooking steak, there is a higher likelihood of overcooking your steak if you’re not familiar with how hot your pan is so you’re likely to get more inconsistent results.
Reverse Sear
The Reverse Sear method is essentially the opposite of the pan frying method mentioned above. Instead of searing your steak first in the pan to get it to the desired doneness, you cook the steak in the oven at a very low temperature until it reaches your desired temperature and then you finish it off on a hot pan to get a nice sear. Since you’re cooking the steak at a lower temperature, the margin of error to accidentally overcook your steak is a lot lower. It also allows the steak to cook more evenly through.
However, depending on the thickness of your steak, the reverse sear method can be time consuming since you are cooking the steak at a much lower temperature. There is also a risk that you may still overcook the steak on the pan when you go to get that sear.
Our preferred cooking method – The Reverse-Sear
In our opinion, the best and easiest way to cook the perfect steak with consistent results every time is using the reverse sear method. This is particularly true for thick cut steaks (i.e. Tomahawk Steak or any steaks at least 1 1/2 to 2 inches thick). It requires very little equipment (just a pan and your oven!). We tend to prefer our steaks cooked to Medium-Rare and not once have we ever overcooked it using this method. The steak also always comes out flavourful and juicy. We’ll share some additional tips & tricks on how to cook the perfect steak later on in the post.

How to Reverse Sear your Steak
1. Prepare your steak and oven
Just before you put your steak in the oven, make sure to pat your steaks completely dry with a paper towel to remove excess moisture. This will help build up a nice crust on the steak as it cooks.

Season your steak generously with kosher salt and freshly ground black pepper. Meanwhile, preheat your oven to anywhere between 200 to 275°F. The lower the temperature, the more evenly the steak will cook but it will also take longer. Then, line a baking tray with aluminum foil and place a wired rack on top. Place your steak on top of this wired rack to help with the air circulation to promote even cooking.
2. Cook your steak in the oven
This is the part that requires a bit of patience and attention. Depending on the thickness of your steak, your cooking time will vary. We recommend setting a timer every 15-30 minutes to begin with to remind you to check the internal temperature of the steak with your instant read thermometer. The goal is to get the internal temperature of the steak 10 to 15°F below the final temperature at which you would like the steak to be served (more on this later).
3. Sear the steak
Once your steak has an internal temperature 10-15°F below your final temperature, take your steak out of the oven. Preheat your cast iron skillet to high and add an oil that has a high smoke point (e.g. grape seed oil, avocado oil). Do not use extra virgin olive oil as the oil will burn given the high temperature. Once your pan is smoking, quickly sear the steak on each side until a nice dark brown crust forms (approximately 2 minutes each side or until your desired internal temperature has been reached). Don’t forget to sear the sides of your steak as well to render any additional fat.
How long to cook your steak
This is the question many people struggle with when cooking a steak, especially when you’re cooking a thick steak! Take our Tomahawk steak for example, it’s almost 2 inches thick and a pretty heavy piece of steak.

If you choose to use the reverse-sear method, refer to the chart below to determine what temperature to remove your steak from the oven. Please note that you will be removing your steak from the oven at a lower temperature than your final cooked temperature as we still need to leave enough buffer room for when the steak gets finished on the pan during the searing process. If you choose to not use the reverse-sear method (e.g. grilling, pan frying), please refer to the “final cooked temperature” column.
| Steak Doneness | Remove from heat at this Temperature | Final Cooked Temperature |
| Rare | 130 to 135°F | 130 to 140°F |
| Medium Rare | 140°F | 145°F |
| Medium | 155°F | 160°F |
| Well Done | 165°F | 170°F |
Having the right tools
Instant Read Thermometer
If you haven’t done so already, we highly recommend you invest in an instant-read thermometer. They’ll take the guess work out of whether your meat is cooked to the desired doneness. We use the one below which you can easily buy from Amazon but any brand will do.

Cast Iron Skillet
One of the key benefits of cooking in a cast iron skillet is its ability to get extremely hot and its ability to retain heat for a long period of time. Both of these factors are important in building that nice brown crust and promote even cooking. We recommend the cast iron skillet by Lodge as it is fairly affordable and does a great job.

Tips & Tricks on How to Cook the Perfect Steak
1. Season the steak generously
Before you cook your steak, season your steak generously with kosher salt and freshly ground black pepper. Do not be afraid to over season – what you must remember is that you’re only seasoning the surface of the steak, not the inside. Therefore, it’s important the steak is well seasoned on the surface to ensure each bite of the steak is full of flavour.

2. Sear the steak on the pan when it is smoking hot
In order to really develop a nice brown crust on your steak, your pan needs to be piping hot. You’ll know when your pan is hot enough when you add your oil to the pan and it literally starts to emit a bit of smoke. We also recommend using an oil with a high smoke point to prevent the oil from burning. Some popular oils with high smoke point include the following:
- Peanut Oil
- Clarified Butter
- Sunflower Oil
- Vegetable Oil
- Canola Oil
Please do not use olive oil for this as it has a very low smoke point.
3. Baste your steak with fat to finish the cooking process
This is completely optional but we often feel this really helps finish the steak to give it extra flavour. When your steak is almost done cooking in the pan, quickly add in a knob of butter along with any other aromatics (e.g. rosemary, thyme, garlic) and start spooning the melted butter onto the steak and baste it. This really helps impart flavour to your steak and bring everything together.
4. Let your steak rest
Patience is truly a virtue. After slow cooking your steak for such a long time, it’s important to let your steak rest for at least 5 minutes so that when you cut into it, you won’t have juices spilling all over your plate. This rest time allows your steak to ‘reabsorb’ all those juices so that when you cut it, you won’t get a pool of steak juice everywhere.
Conclusion
To conclude, if you’re cooking a thick cut steak (1 1/2 to 2 inches thick), the best way to cook the perfect steak is using the reverse sear method. Anything thinner than 1 1/2 inch will run the risk of drying the steak out and is just not worth the extra effort. It should be noted that we are not saying this is not the only way you should cook a steak. However, it is in our opinion, the best and easiest way to cook a thick-cut steak with the most consistent results. Feel free to experiment with all the different ways to cook a steak to find one that works for you! However, a lot of our tips & tricks noted above are still applicable to cooking steak regardless of which cooking method you use. We hope you found this helpful.
If you tried this method and enjoyed it, let us know in the comments below or tag us on Instagram @cookingwithteamj.
